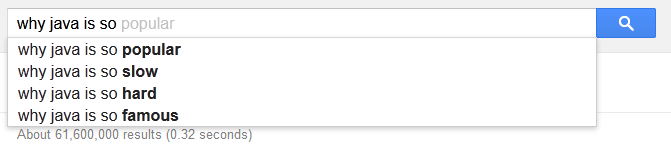
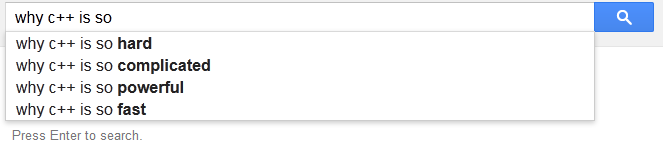
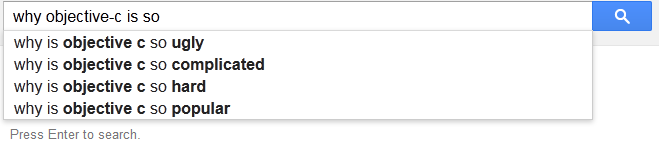
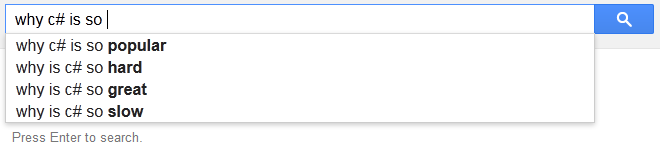
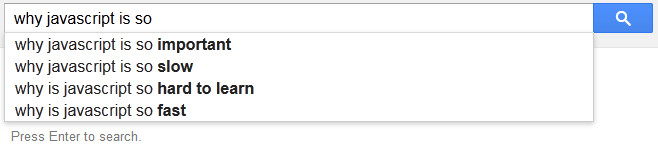
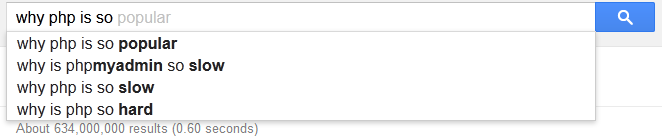
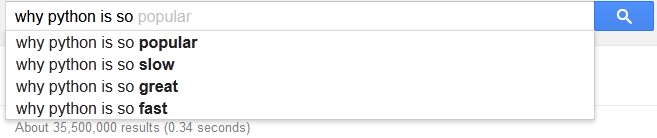
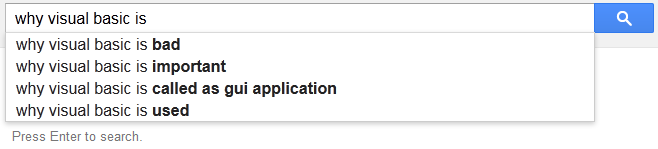
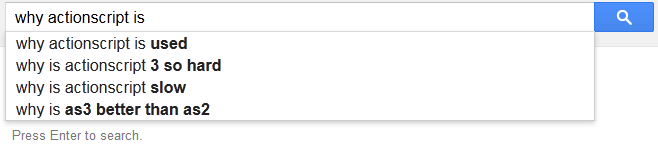
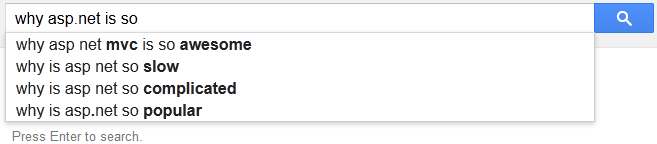
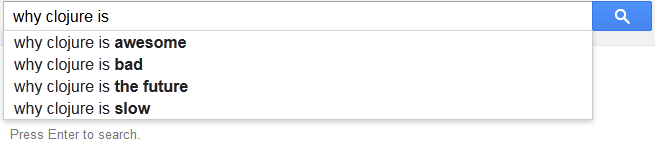
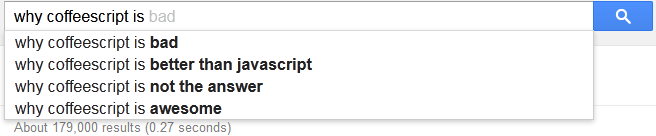
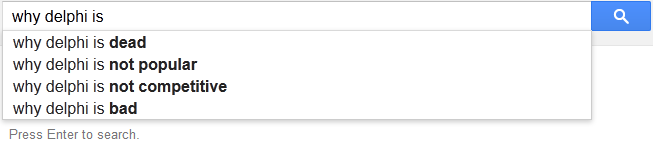
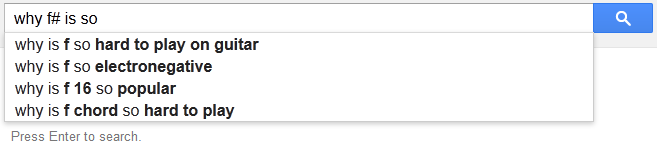
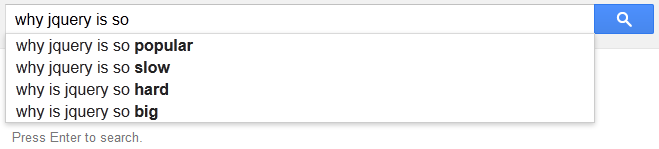
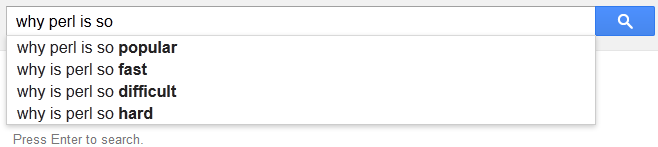
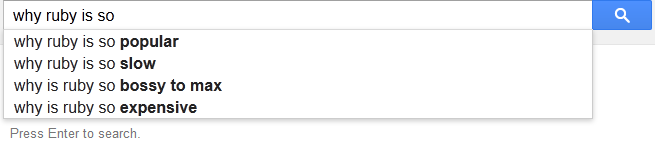
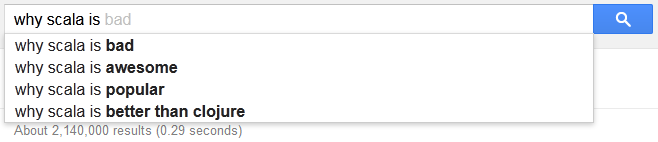
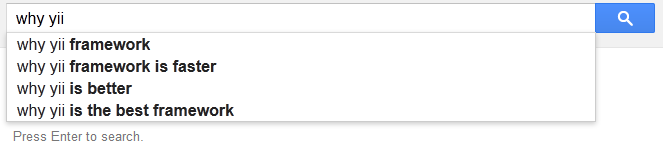
Google autocomplete suggestion give you popular searches for your typed word. Here I search about different programming languages and frameworks. See what Google suggested me.
Some suggestion are really nice but some are.... see.
Besides the fact, AngularJs is Single Page Application, but we use URL routes for bookmarks and for better user experience. An application navigates around the different UI views for different features and actions. Since AngularJs is doesA it do not reload the complete page on each route change but it loads only the HTML for the current page and inject into our current page.
In AngularJs application if you want to redirect the application to another page of the application, and if your navigation element is an anchor tag then you can simply assign new route's URL to href attribute of the tag.
But if your element to navigate is not anchor tag then you need to write a scope function which redirects to your required page and you invoke this function on your element click.
Drafts
and define that function in controller as:
$scope.redirectToDraftPage= function () {
   $location.path('/draft');
};
As you can see it is really annoying to write a scope function for each navigator items. So best way to achieve redirection in AngularJs on element click is to write a directive for this.
Directives
Directives are the custom tags and attributes, it is a way to extend HTML functionality. You can teach HTML new features using directive tags. AngularJs have many directives like ng-show, ng-app, ng-repeat, ng-class, ng-hide and many more.
Directives are HTML tags and attributes. These are the way to use AngularJS extended HTML functionality. Using directives you can teach HTML new features by writing your own custom directives. AngularJS comes with a bunch of built-in directives like ng-app, ng-hide,ng-show, ng-repeat, ng-class and many others.
Include a directive to your application, with restrict: 'A' defining that this directive is actually an extending Attribute, so whenever an element has this custom directive as attribute my defined functionality will be executed accordingly.
So what this directive will do? It will assign a click event to that particular element which has this attribute. And it will redirect to the provided route onclick of the element.
(function(){

    'use strict';

    function ngRedirectTo($window) {
        return {
            restrict: 'A',
            link: function(scope, element, attributes) {
                element.bind('click', function (event) {
                    //assign ng-Redirect-To attribute value to location
                    $window.location.href = attributes.ngRedirectTo;
                });
            }
        };
    }
    angular.module('app').directive('ngRedirectTo', ngRedirectTo);
    //inject $window service for redirection
    redirectTo.$inject = ['$window'];
}());
As naming convention for directive work as each camel-case word separated by hyphen( ie, - ). so our directive ngRedirectTo will be use in html as ng-Redirect-To. Here is the html:
Dashboard
So now you include this directive to your index page and you can reuse this in your whole application wherever you want to navigate. Just add this attribute to the element and assign the route to it.
If you have any feedback or suggestions or you want to add something to this article please post in comments.
So here we are with fifth part of the series, In previous article we see modularity and controller, config, factory of an AngularJS application. In this post we going to see routing or views switching in more details.
Why we need Routing?
First question here is why we need routing as we are working on Single Page Application (SPA). Answer is simple! yes we are working on SPA but user friendly URLs really help in reaching correct page instantly, it also help when your user bookmarks a particular view.
If we have our site http://www.example.com and we are showing the same URLs for all of our page then if user bookmark this URL, on next visit he will again the same URL now your application really not know what user is expected view so application will show home page which is not user friendly way.
Instead this if we show http://www.example.com/aboutus or http://www.example.com/order etc and attach these URL in your application to a particular view templates than it is really helpful and user-friendly.
So routing actually give a logical name to your application's views and bind them to a particular controller.
Routing -Views
How to route in AngularJS?
In previous post we have seen a bit of routing using ngRoute, but in this post we will see routing with UiRouter because UI Router is more powerful and is updated with more advanced feature along with basic functionality ngRoute provide, like Nested Views, multiple named view etc.
For setting routing, Firstly we nee uiRouter library you can download it from here or can use CDN hosted library then we need to add directive ng-view to the main (index.html) view.
It work as a placeholder where all the html will be injected on a fly when particular url will be hit. For instance when user navigate to /#AboutUs , the view linked with AboutUs route will be injected to this placeholder, similarly other route will works.
Now we need add routes to config so we can associate views to urls and also while routing to views we pass the controller to the views.
//here we need to inject ui.router as we using it for routing
var myDemoApp = angular.module('myDemoApp', ['ui.router']);

//$stateprovider is the service procided by ui.router
myDemoApp.config(['$stateProvider', function ($stateProvider) {

//create route object

    var home= {
        url: '/home',
        templateUrl: 'views/Home.html',
        controller: 'HomeCtrl'
    },
    aboutUs= {
        url: '/aboutus',
        templateUrl: 'views/AboutUs.html',
        controller: 'AboutUsCtrl'
    },
    contactUs= {
        url: '/contactus',
        templateUrl: 'views/ContactUs.html',
        controller: 'ContactUsCtrl'
    };

//Now add these route state privider

    $stateProvider
       .state('home', home)
       .state('aboutus', aboutUs)
       .state('contactUs', contactUs);
}]);
Now we add our views and place them in app/views/ folder also we need to add controllers to application module, if we do not need any controller like we just need to show some view which has nothing to show from controller then we can remove controller from above given object but usually each view has some controller to communicate. we can add controller like we have seen in previous post.
myDemoApp.controller('HomeCtrl', function ($scope) {
    $scope.message = 'Hello! we are on Home Page';
})
.controller('AboutUsCtrl', function ($scope) {
    $scope.message = 'Hello! we are on About Us Page';
})
.controller('ContactUsCtrl', function ($scope) {
    $scope.message = 'Hello! we are on Contact Us Page';
});
Now add three html files in views folder in app directory for each route and add html required in each view.
{{message}}
Now we have added everything we needed, save all files and try accessing url application with above configured urls. It must render particular views on different routes.
Master Pages in AngularJS
Master Page is the concept used in ASP.NET, It is the base templates where we put all the common functionality which we need to show on all the pages, so instead repeating same code on all page we create a base page where we code required html, and inherit all pages from this base. Now all pages start showing within this template. These common views can be site log, top navigation, sidebar, logged in user information, footer etc.
We can also achieve this Master Page concept in AngularJS. Lets see it with an example:
Here in above example there are four different layers of views:
Main View with Primar Navigation (Nav Link 1, Nav Link 2 ....)
Second Level View with Sub-Navigation (One, Two, Three ...)
Third Level View with Side Navigation (link1, link2, link3)
Most inner View with content
To achieve this we define a hierarchy of routes.
For example:
/#NavLink1/One/Link1
/#NavLink2/One/Link1
/#NavLink1/Two/Link1
/#NavLink1/Two/Link2
and similarly for all other pages.
angular.module('demoMasterPage', ['ui.router'])
    .config(['$stateProvider', function ($stateProvider) {

    var NavLink1 = {
        //Name must be in format Parent.Child
        name: 'NavLink1',
        url: '/Navlink1',
        templateUrl: 'views/Navlink1.html',
        controller: 'homeCtrl'
    },
    NavLink2 = {
        name: 'NavLink2',
        url: '/Navlink2',
        templateUrl: 'views/Navlink2.html',
        controller: 'homeCtrl'
    },
    NavLink3 = {
        name: 'NavLink3',
        url: '/Navlink3',
        templateUrl: 'views/Navlink3.html',
        controller: 'homeCtrl'
    },

    NavLink1One = {
        name: 'NavLink1.One',
        url: '/Navlink1/One',
        templateUrl: 'views/Navlink1/One.html',
        controller: 'homeCtrl'
    },
    NavLink1Two = {
        name: 'NavLink1.Two',
        url: '/Navlink1/Two',
        templateUrl: 'views/Navlink1/Two.html',
        controller: 'homeCtrl'
    },

   // similarly for NavLink1Three,NavLink1Four, NavLink2One, NavLink2Two and so on.

    NavLink1OneLink1 = {
        name: 'NavLink1.One.Link1',
        url: '/Navlink1/One/Link1',
        templateUrl: 'views/Navlink1/One/Link1.html',
        controller: 'homeCtrl'
    },
    NavLink1OneLink2 = {
        name: 'NavLink1.One.Link2',
        url: '/Navlink1/One/Link2',
        templateUrl: 'views/Navlink1/One/Link2.html',
        controller: 'homeCtrl'
    };
    //Similarly define all the combination you want to separate

   //add routes to stateProvider
    $stateProvider.state('NavLink1', NavLink1)
        .state('NavLink2', NavLink2)
        .state('NavLink3', NavLink3)
        .state('NavLink1.One', NavLink1One)
        .state('NavLink1.Two', NavLink1Two)
        .state('NavLink1.One.Link1', NavLink1OneLink1)
        .state('NavLink1.One.Link2', NavLink1OneLink2);
}])
.config(function ($urlRouterProvider) {

    //set default page to redirect; if wrong route is given redirect here
    $urlRouterProvider.otherwise('/NavLink1/One/Link1');
});
Add different html pages for each views, If view contains a child view so we need to ng-view to that view, except level4 which has no further child views. Here is index.html:
Similarly One will contain navigation and ng-view so it can redirect to child views. Create all the pages and save them in right places and then try your application in browser and see the impact of different routes.
This above example can be optimized in many ways which you will learn as you have more experience in working with AngularJS
So hope now you have clear picture of routing in AngularJS if you have any confusion, question, suggestion or feedback please comment.
So here I am with the fourth article in the series of Learning AngularJS a guide for beginners. If you have not read the previous articles I recommend you to read in sequence, it will help you in understanding more quickly. In this post we will see the modularity of AngularJS Application.
Before starting the real topic we need to see SPA (Single Page Application).
So what is SPA?
Single Page Application(SPA) or also called Single Page Interface (SPI) is a web application in which we have only one main view which is able to load many small pages on a fly, providing enhanced desktop application like fluid user experience.
Traditional web application gives a blink and load impact when we route from one page to another while in SPA we load a main page on first time then we never post back completely instead we load partial or small HTML pages which make it faster and give it a better user experience.
AngularJS application are Single Page Application, we have a main container page index.html load on first go then we only load the views which we required. To load the view at run-time we need to handle routing which is one of the main SPA concepts.
In the previous post we see the directives, filters and data bindings, so now we will see AngularJS as a complete module and how controller, model views, directives, routes actually fit into this module.
we define module for our application as:
<html ng-app="moduleName" >
and in JavaScript we create an object for our module as:
var moduleName = angular.module('moduleName', [ ] );
Defining ng-app on html tag will create a scope for angular application to the HTML and within this HTML scope angular directives , filters and data bindings will work. Since we are working on SPA application so having ng-app on html tag will scope whole application because when this page gets loaded then we not actually loading another page instead we loading partial views which get renders within this main page.
Now we have define the module for our application now we need to add config, controllers, directive, services to our module. Module in actually a container in which we bundle all of our same functionality.
Different module can also interact with each other. If you noticed the empty array passed to the module function with module name is the dependency injection we discussed in our first post. Here we can inject helping module or the module our application depends on. Like for route management we have many already written module available, we just need to pass the module object to our module and then we can use it within our application. We can define multiple modules:
// Define sub modules with no dependencies
angular.module('AccountApp', []);
angular.module('LoginApp', []);

// define main module and inject all other modules as dependencies
angular.module('MainApp', [
    'AccountApp',
    'LoginApp']);
Firstly we set config to our application module in which we can configure routing (we will see in details later). For this we just need to set config in module object.
//we passed ngRoute is an external module for handling routing
var moduleName = angular.module('moduleName', ['ngRoute']);

moduleName.config(function ($routeProvider) {
  $routeProvider

   // route for the home page
   .when('/', {
    templateUrl: 'pages/home.html',
    controller: 'mainController'
  });

});
If you noticed here we also passed the controller to the view previously we declare the controller for a view within the view but that is not a recommended way as we said in Model View Controller view should be independent of controller so it must not be dependent on controller, so better way is to pass controller to view on the fly when we routing to view.
Now View has the controller scope so it can access the scope variables of controller. We also need to add controller to our application module, for this we simple need to add controller to main module object.
 // create the controller and inject Angular's $scope
moduleName.controller('mainController', function ($scope) {
    // create a message to display in our view
    $scope.message = 'Hello friend I am Main Controller';
});
Here in this simple application we do not required a service or factory but in application when we interacting with APIs then we need to create factory [or services, provider, value]. These four are for same things with some different features. As we might need to get User data from server using AJAX calls and we may need it in five different controllers so instead of repeating the same code for fetching user's data in controllers we move this to User Service and then call this service from different controllers.
We can define factory to our application using:
moduleName.factory('MyService', function () {

    var factory = {};

    factory.getUser = function () {
        //..
    }

    return factory;
});
So lets review a complete cycle of angular application. Our application is a single module. It has configured routes when a particular URL get hit, it will be routed to specific View and Controller is also passed to the view at routing. Now View has the scope access of particular controller. It will call the controller for data. Controller will hit the service for data and service will send back data to controller fetching it from server. Controller pass that data to View and View render it accordingly.
So It was concept of modularity in AngularJS application. If you have any confusions or feedback or If you want to see any particular topic regarding AngularJS in this series please comment below.
Continuing the series of Learning AngularJS a guide for beginners, in this post we will see the Directives Filters and Data Bindings. If you are new to AngularJS I would recommend you to read the series of article from start.
To start developing an application you need to download AngularJS Library or you can use CDN for the benefits of caching. include the downloaded AngularJS to your HTML just before the closing body tag this will make sure that your document is loaded when your AngularJS start running.
That is it! you have everything you need to code for AngularJS application. You can use any IDE for coding I would recommend Visual Studio 2013 because of some better JavaScript intellisense.
Now you have included library for AngularJS you are ready to code, to code with AngularJS you need to use Directives.
What are Directives?
Directives are most important or I would say core components of AngularJS. Directives are nothing but HTML tags and attributes. These are the way to use AngularJS extended HTML functionality. Using directives you can teach HTML new features by writing your own custom directives. AngularJS comes with a bunch of built-in directives like ng-app, ng-hide,ng-show, ng-repeat, ng-class and many others.
Directives are markers on the HTML page that tells AngularJS to bind that particular directive functionality(behavior) on a specified element.
Lets see a simple Hello World application:
<html ng-app="">
 <head>
    <title>Anular JS</title>
 </head>
 <body>
     <div id="container" ng-init="name='Zaheer Ahmed'">
     Your Name: <input ng-model="name" type="text" />

     Hello AngularJS world!!!!
     My Name is {{name}}.</div>
   </body>
</html>
So Here we have designed a simple application and we use some AngularJS directives, attributes starting with ng are angular directives.
We started with ng-app the most important directive of AngularJS.
It declares the scope of your application that is the reason it is mostly put at the html tag itself, but it can be use inside html the only thing need to be considered is that AngularJS directive only works within the scope of ng-app directives.
Here we use ng-app attribute without value because for this simple application we do not have any controller or scope (view model). So it works withing this scope. But if we want to use data from this view in our controller then we need to initialize value for this attribute i.e, ng-app='myApp'.
Then we used the ng-init let see it after ng-model, ng-model directive initialized a property in memory with the name given as value, ng-model is one of the ways to bind the $scope(View-Model) properties to the element, since in this example we do not have any controller so the scope of this variable will only be limited for this View.
Since we have pre-initialize the variable name using ng-init so it is already available in the memory so it will use this value and bind it to input input field. So when you run this application you will see input has value 'Zaheer Ahmed' because name was initialize by it.
So these are some basic directive you mostly need to use, as you start practicing you will get familiar to many built-in directives. Here is complete API reference available, you can search and get information about all directives or you can download Angular Cheat Sheet.
Data Binding
Data binding in AngularJS is really simple, as we did in above code simply wrap the variable as {{variable}} on any element, that element is now bounder to the data. ng-model is also a way to bind using attribute as we did in above code example.
Binding in AngularJS is two ways which means if you bounded an element to a data now if that element lets say input change that property the original data in your controller will also be updated or if you update the value of data from controller element will also show changes.
So AngularJS made this so simple using one attribute otherwise developer need to write the code to detect onchange event for getting change from element and also need to update element to update element value.
How Filters work?
Filters are the way to pass all of your data collection to a particular condition. like searching, sorting etc. For example in above code we printed the name enter by user in input field we want to make it upper-case or there is an array we want to upper-case all string there we need to use filters. Filters are applied on a data using bar separator.
So changing above code to :
<html ng-app="">
 <head>
    <title>Anular JS</title>
 </head>
 <body>
    <div id="container" ng-init="name='Zaheer Ahmed'">
      Your Name: <input ng-model="name" type="text" />

      Hello AngularJS world!!!!
      My Name is {{name | uppercase}}.
    </div>
  </body>
</html>
above code will automatically convert input value to upper-case. Here is demo.
Let see another example where we filter data using user input:
<html ng-app>
 <head>
    <title>Anular JS</title>
 </head>
 <body>
    <div id='container' ng-init="names=['Ahmed','John','Jeff',Zaheer']">
       search : <input type="text" ng-model="searchKeyword" />

       <div style='background:#E4E8EA;padding:10px;'>
          Here is list of user name:
          <ul ng-repeat="name in names | filter:searchKeyword">
              <li>{{name | uppercase}}</li>
          </ul>
       </div>
   </div>
 </body>
</html>
Here we initialize an array using ng-init directive and bind input field with another variable searchKeyword like we did in our previous example.
Here we used another directive ng-repeat, this directive keeps repeating element to the number of times data present in given collection. This is really helpful for-example you have 50 users data and you want to show in a particular format. You need to write 50 times the same HTML but with ng-repeat you just need to create a template and using this directive repeat it number of times you want.
Now here we use the filter after bar separator name in names | filter:searchKeyword here we are telling it to filter the collection for searchKeyword, so it will give us only the list containing the keyword input by user.
As you see how simple it was to filter a collection. There are many built-in filters available which include currency[:symbol], filter:expression, json, lowecase, uppercase, orderby etc.
So it was Directives filters and data binding in AngularJs. Hope now you have some base knowledge and with time and practice you will be familiar with more of these.
Hope you find this helpful. Please do comment if you want to see any particular topic of AngularJS in this series and also give your valuable feedback and don't forget to share with friends.
So here we are with the second part of the series learning AngularJs guide for beginners. If you have not read the first Article I strongly recommend you to see the first article of the series Introduction to AngularJS
In this article we are going to see Models Views and Controllers and will see model part of the application also called View Model or $scope in details. It is a really important part of AngularJs.
View Controller and Scope
Views
The AngularJS application has a View which is the part rendered in a browser, it is the way to show the data to users. View uses the directives, filters and data-bindings. But to make view simple and easy to maintainable we do not put all of our code into these View. Separating code from views also make it easy to write tests for the business logic.
Controller
We put all of our logic to container called controller in Angular. The Controller controls and prepare the data into the form so it can be rendered at the View. So Controller actually transforms the bunch of data into the representational form and also take from view and set into the Model after validating it. The controller is responsible for communicating the server code to fetches the data from a server using Ajax calls and send the data to back-end server from Views.
Scope / View Model
The most important part of the architecture is $scope or Model or View Model. It is the actual link between Controllers and Views. There can be a controller which we can bind to two or more views. Like controller for a registration form can have a different view for desktop and another view for mobile. In real Controller has no information about the Views and similarly View is independent of logic implemented or data present in the Controller. $scope acts as the communication tunnel between the Views and Controller.
First Code Example
We will try to implement a simple demo, so it becomes more easier to understand the concept of View Controller and scope. In this simple example we list down the Users. You will definitely find very easy to implement it.
Here is the code of View:
<div ng-controller="MyFirstController">
    <h2>List of User</h2>
    <ul>
        <li ng-repeat="user in Users">
            {{user.firstName}} {{user.lastName}} live in {{user.city}}
        </li>
    </ul>
</div>
Here we are using some AngularJS directives we will see these directives in later articles. Just to make it understand we are telling view that you expect data from this controller using ng-controller directive. It is not necessary to declare a controller here we can set it at run-time with routing.
Here we initialize an angular module application myApp and then added a controller to it. This controller contains a list of users. Then we access the controller and show the list of user in HTML View.
So this was the architecture use in Angular, It is really easy to maintain and much cleaner than ordinary dynamic application code. In next article I will try to cover directives filters and data bindings. Please provide your valuable feedback by comments and let me know if any particular topic you want to see in this series. Don't forget to share it with your friends.
Recently I started learning AngularJs, It was very difficult for me to find some good detailed articles or beginner tutorials on AngularJS. I have to read from many different articles, books and tutorials. So I decided to put step by step help for beginners like me. So they get complete required help from one single channel. Since AngularJS is a very rich framework so I decided to write in a series of post. So beginners easily follow and track their performance.
Lets start with Introduction to AngularJs. There is no coding in this article we will only see what AngularJs is.
What Is AngularJS?
AngularJS is JavaScript MVC structured framework for dynamic web applications. It is created by Google to allow you to develop well architectures and easily maintainable web-applications. AngularJS allows you to extend HTML by adding your own custom tags and attributes. With angularJS you need to write lesser code as It allows you to reuse components. With very easy way of two-way bindings and dependency injection (we will see these in details coming articles) , you need to code less than you have to write before AngularJS. As AngularJs is client-sided so all these things happening in browsers.
HTML is designed for static sites, it is beautiful declarative language. But developing a dynamic site with HTML you need to do many tricks to achieve you want. With AngularJS extending the HTML it is really simple to make a dynamic site in a proper MVC structure. The directive is the terminology use for extending HTML, with these directives one can achieve:
You can create a template and reuse it in application multiple times.
Can bind data to any element in two ways, means changing data will automatically change element and changing element will change the data.
You can directly call the code-behind code in your html.
Easily validate forms and input fields before submitting it.
You can control complete dom structure show/hide, changing everything with AngularJS properties.
AngularJS a complete Solution
AngularJS not only allow you to write your custom HTML. It allows you to completely control your DOM and easily managed your Ajax code which previously you need to manage your own. It has included many other features including:
All the features you need to build a CRUD application like data-binding, data validation, url routing, reusable HTML components and most importantly dependency injection.
JavaScript Testing: AngularJS allows you to write basic flow end-to-end testing, unit-testing, ui mocks.
Proper directory architectures of HTML code in MVC structure.
Until now we use term dependency-injection many times, some of you might not be aware of it. Dependency Injection is a software design pattern, allows you to inject any dependent module at run time means you can anytime change some feature or complete module of any dependent module with this pattern. AngularJs also follow the dependency-injection for example you can change the routing module with your custom written library or may switch many available pre-written libraries for routing.
If you were previously coding with jQuery you might use it for many features which AngularJS already included in it, so instead of depending on two different libraries which is possible to achieve with only having AngularJS, It is better to not include the jQuery file in your page (until it is really necessary) because with AngularJS $http service and rich directive it makes jQuery useless. With AngularJS one thing is sure you have not much cleaner and structured code than jQuery.
This was a short AngularJS introduction in the next article we will see the MVC in AngularJS. So keep commenting the topics you want to see in this series of article so I include articles accordingly.